TL;DR

Get travel and outdoor gear delivered free with Prime
- Fast, free delivery on millions of items
- Prime Video, Amazon Music and more included
- Member-only deals all year
Proper upkeep keeps your luggage durable and functional. From routine cleaning to fixing zippers or wheels, learn practical steps to maintain and repair your travel gear—and decide when to replace it.
Ever arrived at your destination only to find your suitcase’s wheel wobbling or the zipper stuck? You’re not alone. Travel luggage takes a beating—scratches, impacts, dirt—and many issues are fixable with a bit of know-how.
In this guide, you’ll discover how to keep your luggage rolling smoothly, when and how to repair common problems, and ways to decide if it’s time to replace. Think of it as your travel gear’s health check—saving you money and hassle on every trip.
Routine cleaning and lubrication extend your luggage’s lifespan and prevent costly repairs.
Wheels and zippers are the most common failure points—regular maintenance and DIY fixes can save money.
Decide whether to repair or replace by comparing repair costs to new bag prices, considering warranties and damage severity.
Photograph airline damage immediately and file claims within 7 days for maximum compensation.
Many repairs, from cracks to torn fabric, can be DIY if you have the right tools and parts—know when to seek professional help.
Maintaining & Repairing Your Travel Luggage
Scratched shells, wobbling wheels, stuck zippers — luggage takes a beating, but most failures are fixable. This is your suitcase’s health check: routine care, DIY repairs, and the economics of knowing when to let go.
Key Insight
A well-maintained quality suitcase can last 10–20+ years — neglecting simple repairs is what forces early replacement.
The anatomy of luggage failure
Three components cause nearly every luggage breakdown. Ranked by how often they fail — and all three respond to cheap, routine prevention.
Most Common Failure Points (Relative Frequency)
Why routine care matters
Maintenance isn’t cosmetic — it preserves structural integrity. Dirt and debris grind away at moving parts; a jammed zipper can compromise your bag’s security mid-trip. Cleaning and lubrication let you spot minor issues before they escalate, saving money and stress on every journey.
Wash, vacuum, air out
Regular cleaning is the first step to a longer bag life — for shell, fabric, and interior alike.
- Hard shell (polycarbonate, aluminum): mild soap + water; no abrasives
- Soft fabric (nylon, polyester): spot-clean + water-repellent spray
- Interior: vacuum crumbs, air out after every trip
- Odors: baking soda inside, leave overnight
Brush & lubricate
The single most common failure point — and the easiest to prevent.
- Clean teeth with a soft brush
- Lubricate with zipper wax, paraffin, or silicone spray
- Prevents splitting and jamming — the usual causes of failure
- Repeat after beach trips and dusty destinations
Store it right
Where your bag rests between trips matters as much as how you treat it on the road.
- Store clean and fully dry, unzipped or loosely packed
- Cool, dry place — away from sunlight (UV degrades fabric & polycarbonate)
- Never stack heavy items on soft bags
- Use dust covers or pillowcases
Clean
Wash shell or spot-clean fabric; vacuum the interior
Lubricate
Zipper wax on teeth; silicone on wheel axles & handle channels
Inspect
Pick debris from wheels; check handle action, seams, sliders
Store
Dry, unzipped, out of sunlight, nothing heavy on top
Quick fixes you can do yourself
Many repairs — from cracked shells to broken sliders — are DIY if you have the right tools and parts. Know the fix, and know when to call a professional.
Keep them rolling
Hair, thread, and carpet fibers wrap around axles, causing sticking and wobbling. Pick debris out with tweezers regularly.
Silicone lubricant on axles — avoid WD-40 long-term (it damages rubber). Broken wheel? Many are generic sizes: match diameter and bolt pattern (e.g. a 50mm spinner wheel swaps in minutes). Riveted housings → repair shop.
Unstick the telescoping handle
Handles fail from dirt buildup and bending — often from overpacking or dragging bags up stairs by the handle.
Compressed air or a dry lubricant inside the channels restores sticking handles. Bent aluminum tubes usually need the whole assembly replaced — a job for a repair shop. Extend & retract regularly to keep channels clear.
Patch cracks and tears
Small cracks in polycarbonate respond to epoxy or plastic welding kits — think of it like patching a bicycle helmet.
Cracks: plastic repair kit; duct tape as a field fix. Torn nylon/ballistic: iron-on patches or seam tape; large tears near zippers or handle mounts → professional re-stitch. Deep cracks compromising strength → pro assessment.
Repair it — or replace it?
The decision hinges on cost, warranty, and damage severity. Repair if the cost is under ~50% of a new bag, or if the warranty covers it.
| Component | DIY-able? | Typical Fix | When to Go Pro / Replace |
|---|---|---|---|
| Zipper slider | ✓ Yes — costs a few dollars | New slider + pliers at home | Full zipper replacement → repair shop |
| Spinner wheels | ~ Often — if screw-mounted | Match diameter & bolt pattern; generic replacements online | Riveted housings are trickier → shop |
| Telescoping handle | ~ Sticking yes, bent no | Compressed air, dry lubricant, grip swap | Bent tube → replace whole assembly |
| Cracked hard shell | ~ Small cracks only | Epoxy, plastic welding, repair kit | Shattered shell / deep cracks → replace bag |
| Torn fabric | ✓ Yes — small tears | Iron-on patch, seam sealant | Tears near stress points → pro re-stitch |
| Bent frame | ✗ No | — | Structural integrity compromised → replace bag |
Repair when…
Cost is under 50% of the new-bag price, or the damage is covered by warranty. Premium brands — Rimowa, Briggs & Riley, Travelpro, Tumi — offer parts availability and service networks that make fixing worthwhile. Briggs & Riley’s unconditional lifetime warranty even covers airline damage.
Replace when…
Damage is extensive or structural — bent frame, shattered shell — or repairs would exceed half the replacement cost. Budget bags rarely justify repeated fixes, and many “lifetime warranties” cover only manufacturing defects, not airline damage or wear. Read the fine print.
Damage Severity Scale — Where’s Your Bag?
Airline Damage? The 7-Day Claim Chain
Under the Montreal Convention airlines must compensate for damaged checked baggage (cap ≈ 1,288 SDRs / ~US$1,700) — but claims typically must be filed within 7 days. Act at the airport.
Keep your luggage in shape with simple routine care
Regular cleaning is the first step to prolonging your bag’s life. Hard-shell cases like polycarbonate or aluminum need a gentle wipe with mild soap and water—avoid harsh abrasives that scratch the surface. Soft fabrics like nylon or polyester benefit from spot cleaning and periodic water-repellent sprays.
Vacuum the interior to remove crumbs and dust—especially if you carry snacks or muddy shoes. Air out the bag after each trip to prevent mold and odors. For stubborn smells, sprinkle baking soda inside and leave overnight.
Don’t forget zippers. Clean the teeth with a soft brush, then lubricate with zipper wax or silicone spray. This simple step prevents splitting and jamming, often the most common cause of zipper failure.
Why does this matter? Regular maintenance isn’t just about appearance; it preserves the structural integrity of your luggage. Dirt and debris can cause wear and tear over time, leading to costly repairs or early replacement. Lubricating zippers and cleaning the teeth prevent jamming, which can render the zipper unusable and compromise your bag’s security. Consistent care also helps you identify minor issues before they escalate, saving you money and stress in the long run.
As an affiliate, we earn on qualifying purchases.
How to keep wheels rolling smoothly (and fix them if they’re not)
Wheels are the most common repair item—spinner wheels especially. Hair, thread, and carpet fibers wrap around axles, causing sticking or wobbling. Regularly remove debris with tweezers or a pin.
Apply silicone lubricant to the axles to keep wheels spinning freely. Avoid using WD-40 long-term, as it can damage rubber components.
If a wheel breaks off, check if it’s a generic size. Many replacement wheels are easy to find online—just match the diameter and bolt pattern. For example, a 50mm spinner wheel can often be swapped out in minutes.
Note: Inline skate-style wheels are often replaceable, but riveted housings in some models are trickier. When in doubt, a repair shop can handle more complex fixes.
Why is this important? Wheels are your luggage’s contact point with the ground—if they fail, your entire trip can become cumbersome. Regularly cleaning debris prevents unnecessary strain on the axles, reducing wear. Lubrication ensures smooth rotation, which minimizes wobbling and uneven wear. Knowing how to replace wheels yourself can save money and time, especially during travel emergencies. Properly maintained wheels also prevent further damage to the luggage body, preserving your investment for years.
As an affiliate, we earn on qualifying purchases.
Fixing your luggage’s handle—when it gets stuck or bent
Travel luggage handles fail mainly from dirt buildup or overuse. If the telescoping handle sticks, try compressed air to clear dust or apply a dry lubricant inside the channels.
For bent aluminum handles, a repair shop can often straighten or replace the tube. DIY fixes include gently bending back the handle or replacing the grip if it’s torn.
Handle mechanisms are usually the second most common failure after wheels. Regularly extending and retracting your handle keeps dirt from settling deep in the channels.
Why does this matter? Handles are essential for maneuvering your luggage efficiently. Dirt and grime can cause the mechanism to jam or become difficult to operate, leading to frustration or even damage. Bent handles can compromise the structural integrity, risking breakage during travel. Regular use and cleaning can prolong handle life, and knowing when to seek professional repair prevents further damage. A well-functioning handle is crucial for smooth travel, and timely fixes save you money and hassle.
travel luggage cleaning and maintenance tools
As an affiliate, we earn on qualifying purchases.
As an affiliate, we earn on qualifying purchases.
Quick fixes for cracked shells, torn fabric, and broken zippers
Cracked hard shells like polycarbonate can often be repaired with epoxy or plastic welding kits—think of it like patching a bicycle helmet. For small cracks, a quick application of a plastic repair kit works well. These repairs can restore the shell’s structural integrity, preventing further damage and protecting your belongings. Recognizing the severity of cracks is crucial—small, superficial cracks might be easily fixed, but large or deep cracks that compromise the shell’s strength may require professional assessment to ensure safety.
Torn fabric, whether nylon or ballistic, can be patched with iron-on patches or sealed with seam tape. For larger tears, a professional re-stitch ensures durability. Proper patching maintains the fabric’s resistance to wear and tear, extending the life of your luggage. If the tear is near a zipper or handle attachment, consider professional repair to avoid compromising these critical areas.
Zippers are notorious. Replacing a broken slider costs a few dollars and can be done at home with pliers and a new slider. For complete zipper failure, a replacement or professional repair might be more reliable. Understanding whether a zipper issue stems from a worn slider, broken teeth, or misalignment helps you choose the right fix—DIY or professional—saving time and preventing further damage.
Why is this important? Understanding the depth of repair needed helps you decide whether a DIY fix will hold or if professional intervention is necessary. Small cracks or tears, if addressed promptly, can extend your luggage’s life significantly. However, improper repairs might weaken the shell or fabric, leading to further damage. Recognizing when to seek expert help ensures your luggage remains secure and functional, saving you money and avoiding frustration during your travels.
hard shell suitcase replacement wheels
As an affiliate, we earn on qualifying purchases.
As an affiliate, we earn on qualifying purchases.
When and how to decide if it’s time for a new bag
Deciding whether to repair or replace hinges on cost, warranty, and how badly the luggage is damaged. Repair costs under 50% of new price or covered by warranty make repairs worthwhile. This approach ensures you get the maximum value from your current bag without incurring disproportionate costs. For example, investing in repairs for a high-end suitcase with a cracked shell might be justified if the repair is affordable and the warranty covers it, effectively extending its lifespan. Conversely, if the damage is extensive—such as a bent frame, shattered shell, or compromised structural integrity—replacing the bag often becomes the smarter choice. This prevents ongoing repair costs and guarantees safety and reliability on future trips.
Premium brands like Rimowa or Briggs & Riley often have repair services and warranties that justify fixing. Budget options usually don’t, and frequent repairs can add up. Weighing the repair costs against the potential lifespan and the value of warranties helps you make an informed decision—sometimes investing in a new bag is more economical in the long run.
Why does this matter? Making an informed decision about repair versus replacement can save you money and ensure your luggage’s safety and functionality. Overlooking severe damage or choosing repairs that cost nearly as much as a new bag can be counterproductive. Understanding the value of your bag’s condition and the implications of repairs helps you avoid unnecessary expenses and ensures your travel gear remains reliable.
Frequently Asked Questions
How do I fix a broken or stuck zipper? Can I fix it without replacing the whole zipper?
Yes, often a stuck zipper can be fixed by cleaning the teeth with a brush and applying a lubricant like silicone spray. If the slider is worn, replacing it with a new one is usually simple and inexpensive. For split zippers, a full replacement might be necessary, but DIY fixes often work for minor issues.
My spinner wheel broke off — can I replace it myself, and where do I buy matching wheels?
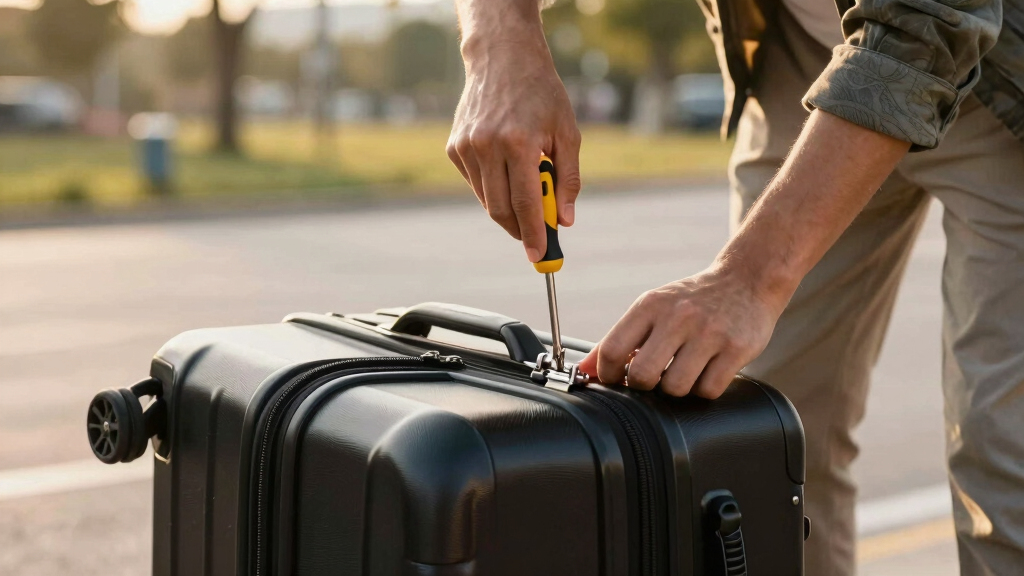
Many spinner wheels are standard-sized and available online. Measure the diameter and bolt pattern—common sizes are 50mm or 60mm—and look for replacement wheels compatible with your model. Most can be swapped in minutes with a screwdriver, saving you repair fees.
Is it worth repairing my suitcase, or should I just buy a new one?
Decide based on repair costs relative to the bag’s value and age. If repairs cost less than 50% of a new bag, and the damage isn’t structural, fixing makes sense—especially if your warranty covers parts. For heavily worn or outdated luggage, replacement might be smarter.
The airline damaged my bag — how do I file a claim, and what will they pay for?
Photograph the damage immediately and file a Property Irregularity Report (PIR) at the airport. Under the Montreal Convention, airlines cover damages up to about US$1,700 if you file within 7 days. Keep all receipts and photos—prompt action boosts your chances of fair compensation.
How do I clean my suitcase inside and out (including vomit, mold, or bedbug concerns)?
Use mild soap and water for hard shells; for fabric, spot-clean with fabric-safe cleaners. Inside, vacuum thoroughly and air out. For odors, sprinkle baking soda, and for stains, use appropriate stain removers. Always dry completely before storing to prevent mildew.
Conclusion
Maintaining your luggage isn’t just about cleaning it—it’s about proactive repairs that stretch every dollar. A little effort now saves you money, stress, and the hassle of buying a new bag sooner than needed.
Think of your suitcase as a trusted travel partner—keep it in good shape, and it’ll keep up with your adventures for years to come. When in doubt, weigh the repair against replacing—sometimes, a fresh start is best.
Halloween Picks
halloween
As an affiliate, we earn on qualifying purchases.